How to configure a Document Information Panel in SharePoint/Office 365
Before I dig deep into how to design and configure a document information panel, let’s take a look at the Document Information Panel itself.
Most of the time the SharePoint world has a requirement of configuring different metadata properties for documents stored in SharePoint document libraries. These metadata properties are maintained through columns in libraries.
While creating a new document in a library, which has some additional columns, there is always a painful, multistep way of creating and saving the documents. First, users create a new document from the ‘new’ button. Then, after completing the document, the user has to close the document and edit properties through SharePoint libraries to update the values of columns. Then only that user can check-in the documents.
To overcome this, Microsoft introduced the Document Information Panel. This helps users configure column values directly from the ribbon in the document (be it an Excel, Word or PowerPoint file).
Below is an example of what a Document Information Panel looks like:
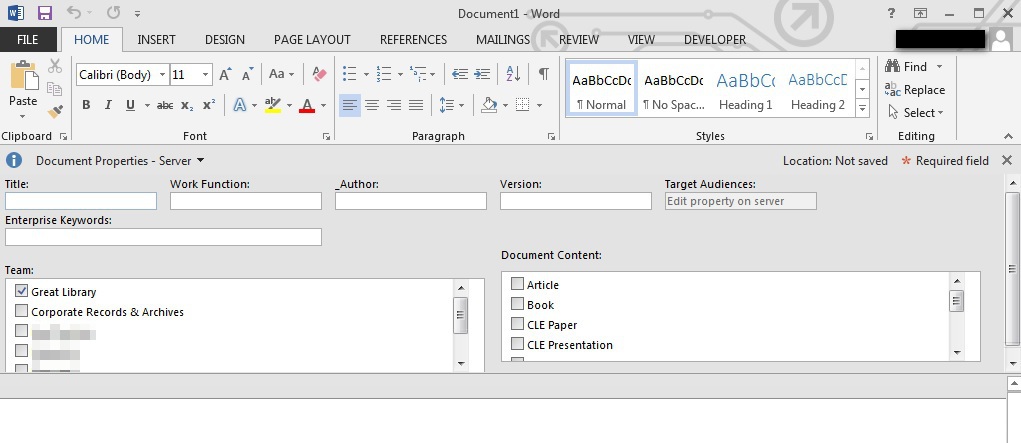
Enabling a Document Information Panel in SharePoint
Follow the below steps to enable a Document Information Panel in SharePoint:
Step 1: Navigate to the document library where you would like to enable a Document Information Panel.
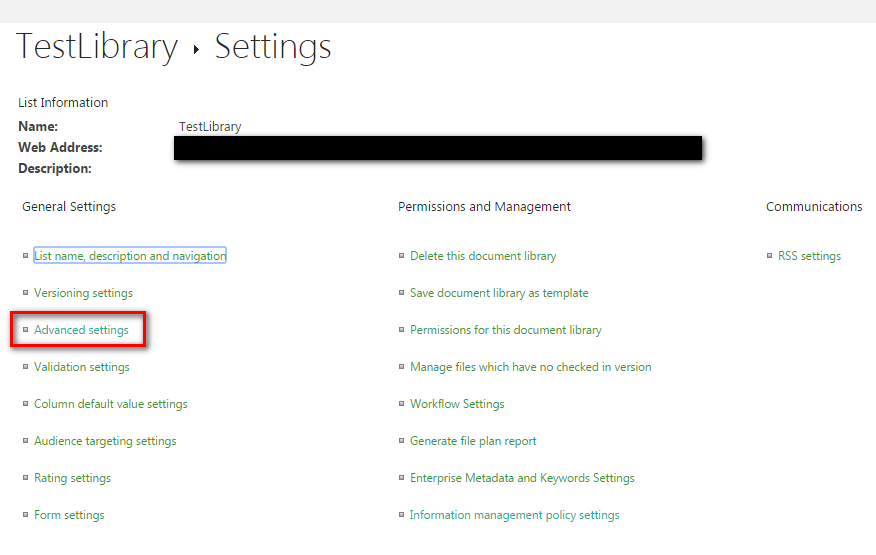
Step 2: From Ribbon, click on settings to navigate to Library settings Page.
Step 3: In the library Settings, you have to update the setting of content type. Enable management of content type if not already done. Below are the steps for it.
Step 3.a: Click on Advanced Settings.
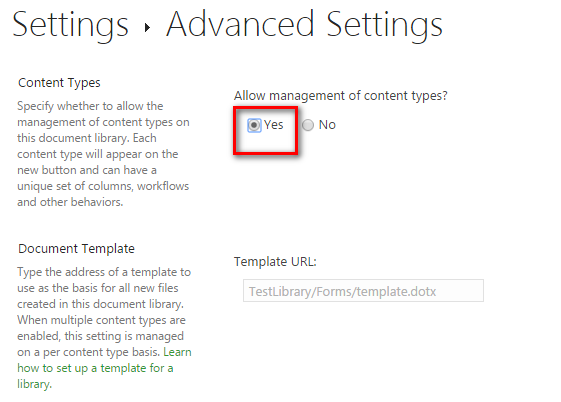
Step 3.b: Click on yes Radio button against “Allow management of Content Types?” and then click ‘OK’ at bottom of the page.
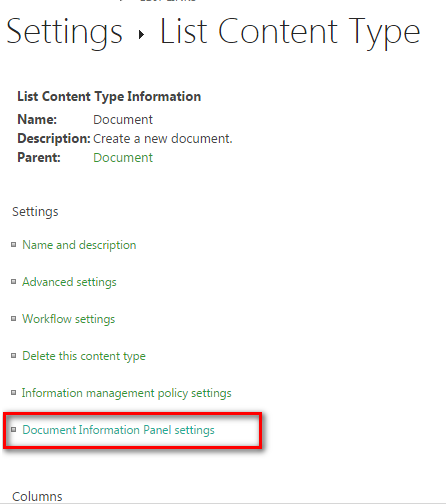
Step 4: Now, click on Document Content Type under Content Types section:
Step 5: Click on Document Information panel Settings on the Document Content Type Settings page:
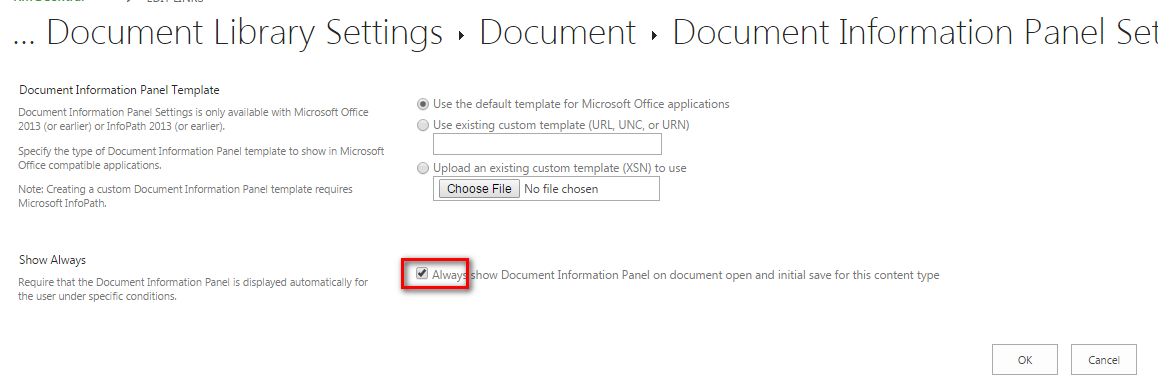
Step 6: On “Document Information Panel Settings” page, select the check box saying ‘Always Show the Document Information Panel’… and click ‘ok’.
Step 7: Now go back to the document library and create a new document. Open it in ‘Client Application’ while creating and you will be presented with a Document Information Panel with all columns of the originating document library.
How to design using InfoPath:
Step 1: In InfoPath Designer, click on File Tab then Advanced Form Templates, then on Document Information Panel. Then Select Design Form.
Step 2: Provide the URL of the document library and click next.
Step 3: Select the content type that you want to customize in the selected document library. Click next.
InfoPath warns you if a custom document information panel has already been created for this content type. To create another custom form, click ok.
Step 4: Click finish.
InfoPath loads an auto-generated Document Information Panel, based on the content type schema.
Step 5: Edit and customize the form as you want, and then save the form template locally.
Note that if you want to make subsequent changes to this custom Document Information Panel after initially publishing it, you must open this local copy of the form template in InfoPath Designer, and then republish it.
Step 6: Publish the form.
Facts about Document Information Panels:
- The Document Information Panel is displayed only on client applications. It means it will not be displayed while viewing documents in browser.
- In Office 2016, the Document Information Panel won’t appear on the ribbon. To access a Document Information Panel in Office 2016 applications you need to go to Info tab under File menu.
Learn about our SharePoint curriculum here

